A bit of History Uncovered

Posted on January 27th, 2012 by Dave under Bikes, custom bicycles, Tandem bicycles, velodrome.

After my good friend Pino Morroni died I purchased some of his tooling from the family. Among the odds and ends were an assortment of frame building jigs of his own design. The other day I was cleaning up the shop and decided to give one of the jigs, that had become particularly dirty, a good dust off.

Much to my surprise I found that Pino had signed this one and written an interesting bit of philosophy in his own hand. It said, in Italian:

Pino Morroni
Detroit maggio 1978
alla facciaccia di tutti i maghi del telaio di tutti i Walden mel mondo

Made in Warren, MI Click to enlarge

The best translation I’ve heard is: In the brazen face of all
the frame sorcerers to all the “Walden’s” of the world..

I’m not sure what he was trying to get at, but knowing that Pino was usually disappointed with the way his ideas were generally received, I suspect it’s a rebuke to them.  That’ a purely WAG on my part. Any other ideas are welcomed.

Here’s what the wonderful little jig looks like. The legs are off and its sitting on the floor, but you get the idea.

Pino Morroni frame jig 1978- CLICK ON IT

Just a fun piece of cycling lore for all.

DP

Comments (1)

Agatha A Healey

Posted on January 21st, 2012 by Dave under Austin Healey.
Tags: ,

One day 6 or 7 years ago I got a phone call from a couple who had recently relocated to NM from Florida.  They explained that they had an old ’55 Healey they had purchased from a junk yard and they had brought it with them and thanks to a windfall at a local Casino had some money to restore the car.  Judy just sent this:

“you picked her up in December of 2002 and I made my first drive in October 2003.”

Well, if you say “no” they go somewhere else.  I made arrangements to go look at the car some 30 miles from my location. If I recall correctly I took a friend with me. He was Dan Pendergraft, somewhat of a Healey expert and definitely a Healey racing expert from his experiences with the Healey Challenge series. Here’s one of many links, BTW that’s Dan’s #106 at the front http://healey.org/content/category/10/97/243/ or maybe Phillip Coombs.. can’t tell for sure.. I’m sure I’ll be hearing from one of them…  Ok, it’s not Dan’s #106, his was RHD and no driving lights. Ergo it must be Phillip.. #105

When we arrived we found a pretty sad looking mess. The fenders were held on with duct tape, for instance. It was a right hand drive car. On the positive side it was mostly all there and it had a louvered hood, but no cold air box. We thought that perhaps it was from Jamaica and had made its way to FL. We suggested the owner (Judy) send off for a heritage certificate from the UK and see what we could ascertain of the cars history.

In the meantime we arrived at an agreement and loaded up the “stuff” and had it hauled to my shop for complete tear down.
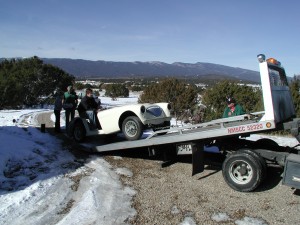
Start of an odessey

In the meantime the Heritage Certificate arrived and we were all very pleasantly surprised to learn the car was the 2nd factory 100M built. So it went from a desirable Healey 100 to a very sought after factory hot rod! Needless to say our plans of ending up with a nice “driver’ changed to a more aggressive  restoration since the car had suddenly more than doubled in value.

Here is Dan studying the car after it was at my shop and some basic steps had begun.

Ready for the long haul

Rough stuff

Well, I wanted to replace floors and sills and a bit more than Judy, but there was a budget in place so I did as much as I could get away with and no doubt wanted a better result than the customer at this point,  but she still wasn’t as convinced that the car was “that” valuable.

Here, I’ve replaced door hinge panels, trunk floor, bulkhead bits, battery access area and much more and sent it to a body shop/painter who Dan thought would do an economically credible job on the body work.

Judy&Dan at delivery to body shop

Here’s a series of progressions though the body and paint work.. In the meantime I was busy with the engine and trim and interior items…

pieces parts

In the paint booth

Rolling chassis

Back to my shop for assembly…

engine bay and electrical s going in

Engine in, starting to look like a car again..

Bumper back from the plater, lights, windshield..

Here’s another customer and his wife examining the nearly done car. BTW, the Heritage Certificate indicated that the car left the factory as a left hand drive. That change was made early on if you’re wondering..

"Is it safe to drive?"

Well, I’ll just cut to the chase.. Agatha, as Judy named the car, has been a star at most of the shows and conclaves she’s attended.

Judy is a dedicated owner and has become active in several car clubs and become a “gearhead” through her association with Agatha.

Here’s a highlight for Judy when she won a top honor at the San Diego Conclave and Gerry Coker told her that if he’d had his way he too would have used more chrome like we did with Agatha’s rebuild.

Gerry Coker congratulates Agatha and Judy

Thanks to Judy for her pictures she supplied for this entry. dp

Judy just sent this followup note that she wanted included…

“Enjoyed the write-up.  As a matter of fact, I have all the paperwork regarding prior owners/transfers.  More correctly I have the copies as when we registered Agatha in New Mexico they demanded the original paperwork.  Didn’t make me happy, but…
Agatha came into the port of Miami and never left Dade County.  She had 6 owners, the last not including the junkyard was a priest who got her from the wife of a deceased parishioner.  She gave it to him as he apparently was very kind to her husband.  It was that priest who had the accident that sent her to the junkyard.  When she got changed to right hand drive is a mystery as she was originally left hand drive.
It is my intention to keep Agatha.  I’m not sure what will happen to her when I die.  If my husband is still alive, she of course will belong to him.  Otherwise she will be a part of the ‘estate’ and treated as such.  I know I will only want for her to have a good home.  I know, geez, an emotional attachment to a car.
Thanks Dave, Agatha and I are indebted to you.  Oh I appreciate the ‘gearhead.’
Judy”


Comments (0)

Dolling up an XK 150 S Jaguar

Posted on January 1st, 2012 by Dave under Austin Healey, auto restoration.
Tags:

I’d have to say that Jag XK’s are right near the top of my favorite old sports cars from the UK. Probably a XK140 roadster would top that list just because they look the best to me, however for sheer brute strength it would be the XK150 S.

The 150 S had three 2″ HD8 SU carbs on long individual intake manifolds and the 9:1 high compression hemi- head. Some were 3.4 Liter displacement and some were 3.8L All had 4 wheel disc brakes, a first for Jaguar cars.

Here is a bevy of XK 150’s in front of my shop, the red ‘S’ roadster, a black 150 ‘drop-head’ or convertible in US parlance, and a white ‘fixed head’ or coupe if you like.

Customers Jags-3 XK150’s on the same day!

(  Click once or twice on pixs to enlarge)

The black DHC is one I am just finishing up a multi-year restoration on. Perhaps I’ll finish documenting  it in the future. Today’s entry however regards the red roadster and its mechanical ills.

The car presented with a lack of power and a lot (!) of valve tappet racket. These engines are of twin overhead cam shafts which act directly on the valve stems with an inverted bucket, the lash (valve clearance) adjusted via variable thickness shims or discs between the bucket and valve stem.

Visual inspection after removing the cam cover (exhaust side-where the noise was) showed nothing and compression reading were within normal expected at cranking speed. Now, its not too uncommon for the exhaust side to have the sleeve that the buckets reside within to move from their factory interference fit depth setting.  Clever aftermarket plates are sold to sit on the vertical exposed face of the sleeves to hold them stationary in the head. So, I ordered a kit and installed it, but it made no difference in the racket. Sigh.

Bucket sleeve hold down plates

The picture above is after the head was removed. Since the hold downs didn’t fix the problem, I informed the owner that the head would have to be removed to see what was going on. I ought to buy a boroscope , but even then the head still has to be pulled to repair it. These triple carb cars require quite a bit more time to take apart as the inner engine compartment panels have to be removed and the fuel system piping and filters are a nightmare.. Try counting all the nuts that were removed, polished and replaced!

Well to make a long story short, the offending cylinder/valve was a wallowed out valve guide and do I mean wallowed out. Here’s a picture. Compare the guide diameters..

The guide in the middle is nearly half again the size of the adjacent guides.

As it turned out all the exhaust seats, guides and valves were replaced. I also installed new intake guides and 2 intake valves, did a 3 angle valve job and resurfaced the head. might as well do it right when its apart.

From the picture below its also clear to see that the cosmetic condition was rough and the customer requested that the entire engine compartment be detailed as best as possible with out removing the engine and other major assemblies.

A rough idea of the “before” picture

As you can see there was a lot of corrosion/oxidation on all the aluminum and the paint was badly degraded and the block was painted a GM orange at some point in the cars past. UGH!

So the customer wanted everything polished and painted..which meant dis-assembly and rebuild of the carbs and manifolds…

One of the big SU’s and the aux. cold start “carb” and piping.

After nearly a full day of standing in front of the polishing wheel, here are some of the finished bits..

Still have the carburetors to polish..

here’s the area prepped for repainting parts of the firewall and radiator surround..

Takes longer to mask than to squirt some paint…

And finally here is what it looks like now…

More than a couple hours of work..believe me!

So after restoring the air filter assembly and painting the under side of the hood (bonnet) it was looking damn nice and needless to say the car ran like a scalded cat.

Cost? More than the customer wanted to hear, but it was what he’d asked for and he did get some frequent flyer points from his credit card company.. :~)

Dave

Comments (0)