Jaguar XK150 Drophead project
I’m going to attempt to semi- document the restoration of an old Jag.
Click once or twice on photos for close ups. Use back arrow to return to text.
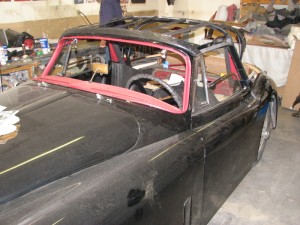
My customer bought it in 2006 thinking it would be a pretty easy job, well, no. Here’s a picture or two of the original condition.
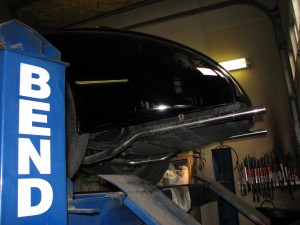
The rear half of the car had sustained a lot of damage and was poorly repaired and heat distorted from all the welding, so the entire body was cut in half behind the driver’s seat.
The new rear was fabricated down in Chula Vista, CA by new found friend Jorge. More on Jorge later. The fenders are still missing as one was a terrible fit. The original rear end en toto was shipped to Jorge so he had a good “pattern” to work with. Apparently there were differences with the FHC, the Roadster, and the Drophead.
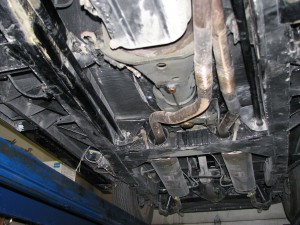
A shot of the dirty, from the body shop dust and wet sanding, of the new dual exhaust and the missing automatic transmission, which was replaced with a Jag manual and Laycock Overdrive.
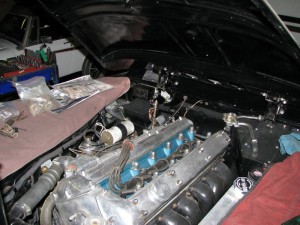
As you can see the car is now black.. I installed the engine and running gear after painting the engine compartment beforehand. Some of the new harness was also installed, so the painter could easily move the car under it’s own power. The compartment was also pre-painted so the painter could simply mask off the entire area and not over spray everything in sight. I’m currently working in the corner installing more harness and fuse block bits.
OK the corner or correctly the fuse block, wiring strip connector, voltage regulator, and cover (sans the hold down stud and nut) are installed. For some reason the fuse block won’t sit flush on the one rear/right corner. I looked at the original (before dismantling) pictures and there was no fastener there then either. Odd..I think. I’ll spend some time there when I get back to doing the “details”, right now I’ll push on with the front half of the cars electricals.
In this next shot the headlight buckets and adjusters and all are installed. The re-chromer’s shop still has the bezels and a whole pile of other stuff.
Well, this should be fun… There are still about 9 pieces of the full wiring harness to install.
Got it whittled down a bit today. Only 5 sub harness bits left to go.. here’s with a flash and without a flash..
It’s been about a week and as the chrome parts are trickling back from the plater (Triple Plate in WA.) I’m getting the lights all installed and wired and functional.
The rear boot lid was a real problem to both fit and make the latch and lock work again.
and here’s the front. In both photos the bumpers are not fully attached, if you’re curious about the angle…
Rear end of the 150 all done…except for the interior of the boot..
The steering wheel was a mess. They, I believe, were originally enameled completely. the hub, the spokes and the rim. I don’t mean paint enamel either, its the hard baked ceramic like finish. Well, this one was totally devoid of the original enamel. After soda blasting the paint off there was nothing but the most porous metallic surface I’ve ever seen. I tried to paint it with straight black Imron, but the thousands of tiny holes just caused an air bubble mess. So, it was blasted clean again and sent to a powder coater, who after two coats made a nice job of it. The old rim wrap is back on to protect it while the car is at the upholstery shop. The Bakelite ring around the horn ring really looks better than the camera flash makes it appear.
This next one was a bit of a challenge. The grille originally had a lip of some sort cast into the bottom inside edge that acted as a safety catch should the main latch fail. No one wants a bonnet bent over the windshield. Anyway, there was no easy way to weld anything to the newly chromed grill.. note (do this stuff before sending to re-chromer) so I had to fab a catch. Using 5/16” tubing I cut and brazed together a hanging loop from about the grill’s midpoint, where it had a drill-able spot on the bonnet. Then it drops down in a smooth V like shape and catches the latch on the pan behind the grill… Pretty neat and it barely shows..
The next day or two will be used to install some noise deadening blanket material. Then the customer has a remote located radio, requiring an inverter for the positive ground nature of the car and lastly the speakers which also need to be hidden some where in the vicinity of the two rear jump seats..
The side glass and vent wings and chrome is in. New fuzzy velcro in the guide channel. The amp and inverter for the hidden “Secret Radio” is installed. See it?
Set back…
The project leaves tomorrow for the upholstery shop. I’m planning on driving it the several miles there. Need some cushions to sit on and someone to run interference as the seat belts aren’t exactly installed yet..
Well the car has been at the upholstery shop for a couple months now. Mostly it’s been a fight to rebend and fit the wood pieces that were badly warped.. the new stuff fits worse in many cases… here where it is today..
Stay tuned..much more to come……
The project car recently returned from the “top shop” a couple weeks ago. They have completed most of the work, but the trunk (boot) is still unfinished and two side kick panels in the cockpit are needing panels to be made. We are unhappy with the fit of the top at the windshield header, but I’ve come up with a simple solution I hope.
Here are pictures of the interior so far.
The new wheels and tires are on and the front end aligned and new rear springs have it going down the road indescribably well.
As soon as the remaining upholstery work is complete, it will go back to the paint shop for flaw and incidental flaw repair and final buff out. Then, my friends, I’m afraid I will have to turn it over to the rightful owner. A dark day indeed..for me…


